When you publish a calendar, the Publish Settings page contains a variety of ways to specify how you want your published Trumba® calendar to appear and behave.
See also: Set up event actions
Depending on how you set up your calendars during the implementation process, the calendar you publish may not contain any or all of the events you want your site visitors to see.
To include the events you want to display with the publication, you can mix in other calendars during the publication process. One advantage of mix-ins is that you can add a Calendar List control spud that lets visitors display or hide mixed-in calendars, giving the visitors control over which events they see.
Tip Instead of adding a separate Calendar List control spud, you can display an embedded calendar list above main calendar spuds. Learn more.
For example, if your organization offers different types of training classes, you might create a calendar for each type. When you publish the master calendar, you mix in each training type calendar, and then provide a Calendar List spud that lets visitors display only the training events they care about.

Calendar list spud with a custom label
You can find the Publish Settings link either in the calendar actions drop-down, or above your calendar.
On the Publish Settings tab, in the Publish Settings header, click Edit Publish Settings.
For example, you might change the label to Event Types or Select Categories.
Tip The calendar colors in the Calendar List spud reflect the colors you set on the Edit Calendar Colors page in the Publishing Control Panel. Learn more.
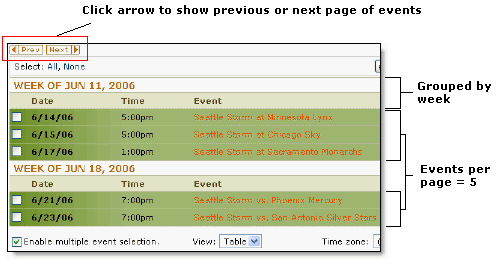
After you publish your calendar, you select the views you want to provide to visitors. If you use calendar views that display events in a list-based format, such as List, Compact List, Table, 3 Columns, and so on, you might want to limit the number of events that appear in one view, so that visitors don't have to scroll through one long list to find a future event.
When you divide your event list into sections, navigation arrows appear on the calendar, so that visitors can view the previous or next set of events. In addition, events on one page are arranged into sub-sections with headings. In the picture of a published calendar below, the paging is set to show five events per page, and events are grouped by week.
Or, if you want to add and customize a new calendar view, in the blue Main Calendar Spud bar, click Add a Calendar View).
If you want to list events in ascending order towards the future, leave Ascending (Future) selected.
If you want to list events in descending order towards the past (that is, most future events first), select Descending (Past).
For example, if you keep the default of 25, 25 events will be listed. To see the next 25, visitors click Next.
If you want Trumba Connect to estimate the number of events to display to avoid breaking up events in the same group (set in the Grouping section), select Smart.
For example, if you set Events per page to 15, Group by to Month, and a month contains 20 events, Trumba Connect will try to display all 20 of the events on the same page.
The current day, select Current Day.
The following day, select Next Day.
The first day of the group you define in the Grouping section, select Current Group. For example, if you group by week and select Current Group, the event display always starts with events from Monday of the current week (even if the current day is Wednesday or another day in that week).
A specific date, select Custom Date, and then type the date in the mm/dd/yyyy format.
Not all calendar views support supgrouping. To learn more about calendar views, see Which calendar view to choose.
The grouping choices you make depend upon the number of events you promote. For example, if you promote a lot of events on each day, you might want to group by day and subgroup by start time. If you promote a steady but relatively small number of events, you might want to group by month with no subgrouping.
To group by custom date ranges, select Custom.
If you want ongoing and multi-day events to appear on your calendar on every date of their durations, select Include events that started in the past and Group by or Subgroup by Day.
If you deselect Include events that started in the past, the event will only be shown on the first day of the event, regardless of grouping selected. After the event starts, even if the event has not ended, it will no longer appear on the calendar.
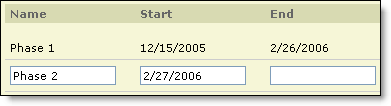
For example, if you're publishing a project schedule, you might name the first time period Phase 1.
If you're publishing an academic schedule, you might name the first time period Fall semester.
Tips