You might already be quite familiar with integrating Trumba® Connect calendar spuds into your website by using the code that Trumba Connect displays on various tabs in in the Publishing Control Panel. But how does this code work? How does your main calendar spud know when a visitor has taken an action on an adjacent view-chooser spud? And can you manipulate a spud from outside of the Trumba editing environment?
This topic and the related topics it links to describe the components that make up a spud, what steps are involved in displaying a spud on a page, and how to control spuds through the spud API.
Note The spud API and related topics assume that you are familiar with the way programming languages and URL parameters work, and that you can easily find your way around HTML or other web programming-language code.
When you publish a calendar, Trumba Connect opens the Publishing Control Panel. This is where you configure your spuds and find the code you can copy to embed spuds into your own web pages. That code contains these two components:
Spud code in the Publishing Control Panel looks something like this:
In the actual code you see, name is replaced with the web name of your calendar and type with the type of spud you're embedding.
Show me a complete list of spud types.
The first <script> tag in the Trumba Connect generated code runs the spud controller (spuds.js):
<script type="text/javascript" src="//www.trumba.com/scripts/spuds.js"></script>
The spud controller presides over the spuds on a web page, monitoring requests made on each one. It facilitates communication among the spuds on the page and communication between each spud and the Trumba Connect source database.
Note The spud controller script needs to run before spud code runs. Because any spud could be the first or only spud on a web page, in the Publishing Control Panel, the controller script is included with every spud. If you're embedding multiple spuds into the same page, however, you can include just one copy of the controller script. For example, you might want to place the controller script in the <head> section of an HTML page.
When browsers display content on secure (https) pages, they check to make sure all of the content on the pages is also secure.
Trumba now creates the spuds.js section of the spud script code without specifying the protocol (http vs. https). This script, such as in the example just below, loads using whatever protocol that the hosting page uses:
If you've used spud script code on your website that was generated by Trumba prior to this change, however, the spuds.js section may include "http:" as shown here:
Because the URL in that code begins with http rather than https, the browser interprets the spud content as potentially insecure.
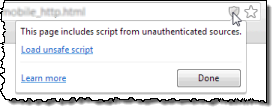
Browsers respond to this differently, sometimes in ways that aren't obvious or that might cause concern for page visitors. For example:
This method takes one parameter, which is an associative array of arguments, using the JSON (JavaScript Object Notation) syntax. Two arguments are required to display the spud, webName and spudType. Others are optional for refining spud behavior.
Show me a complete list of the $Trumba.addSpud() method's arguments.
Show me a complete list of spud types.
The $Trumba.addSpud() method defines which calendar on the Trumba server to request data from and which spud to use to present the data. It also registers the spud with the spud controller, so that the spud can communicate with other spuds on the page and with the database that holds your source calendar data.
The spud is displayed according to the style and behavior attributes that you set in the Publishing Control Panel. However, the $Trumba.addSpud() method can also take local parameters (such as the url and teaserBase arguments shown in the examples below) that can override some control panel settings.
The following examples illustrate the use of the $Trumba.addSpud() method's required arguments as well as the optional, local url and teaserBase arguments. For more details about these arguments, see $Trumba.addSpud() method.
Tip The code samples below do not include the spud controller. If you copy and paste the code, be sure to add the controller somewhere on the page.
As shown in the spud embedded below the sample code (from the Trumba University demo website), the events URL parameter sets the number of events the spud displays to 4. The teaserBase argument designates the page containing a main calendar spud where event details will open (to test the teaserBase, click an event title).
As shown in the spud embedded below the sample code (from the Trumba University demo website), URL parameters switch the default calendar view to 3 Columns, group events by week, and limit the number of events displayed to 6 per page.