Custom objects are directories, collections of records that share a common set of attributes.
After you work with Trumba Customer Service to create a new custom object, the custom object name appears in a new tab above the Trumba editing environment, as highlighted here:
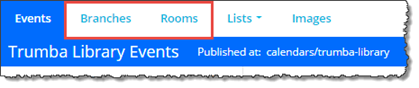
You can click a custom object tab to open a page where you can add, modify, and remove records from the custom object, share it with other accounts, and more.
There are two types of custom objects:
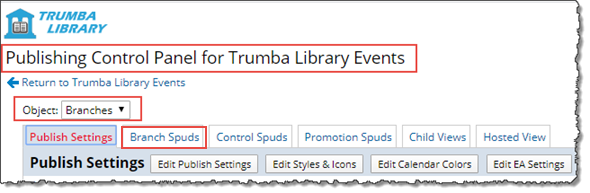
In this case, you can configure publish settings for the custom object through the Publishing Control Panel for the published calendar. For example below, the Branches custom object is mixed in with our demo Trumba Library calendar.
When you select the custom object from the Object drop-down, such with Branches below, the tabs on the Publishing Control Panel are then dedicated to the custom object.
You can then configure and use the spud code provided on the tabs (for example, on the Branch Spuds tab below) to publish the directories on their own pages, as appropriate, along with their control spuds and/or promotion spuds:
Important After you mix in a custom object folder with a published calendar, the Publish Settings command no longer appears on the custom object page, such with the Branches custom object page shown below.
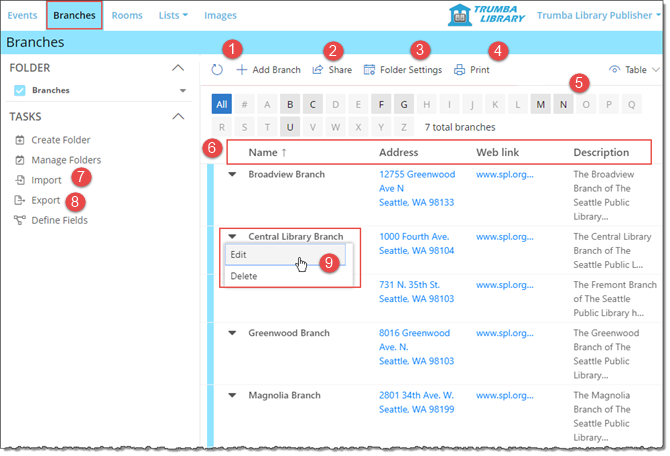
The following image shows a simple custom object folder, including four records (rows represent records), each of which has four attributes (columns represent attributes): Name, Address, Web Link, and Description
The table that follows the image describes each of the numbered management options.
| # | Description | Tips |

|
Add, delete, and modify records |
To add a new record:
What does it mean to enable a custom sort order? Tip To edit or delete an existing record, click the down arrow to the left of the name. You can also click the name ( |

|
Share |
You can share a custom object so that another account holder can add, delete, and modify records. Or, you might want to give other account holders access to the custom object spud code so that they can embed the directory into their own websites.
(If you don't see the Share button, it means another account holder created the custom object and shared it with you. You don't have permission to share it with others.) Tell me more about how sharing works. Tip If you want to allow other account holders assign values to events, you can also share a calendar, template, or field. |

|
Folder Settings |
When you first create a custom object, a folder is also created to hold the object's records. The Folder Settings form is where you set the object folder's properties.
You can modify the folder properties at any time by clicking the Folder Settings button. |

|
You can print the records currently listed on your custom object page.
Clicking Print opens a printer-friendly page that contains the records currently displaying in your list, plus a print date and time. (You may need to scroll or shrink the page resolution to display, and then print, additional records.) Tip If, in the editing environment, you assigned a color to the custom object, you might want to make sure that background printing is turned off in your browser before you print. |
|

|
Find records alphabetically by name |
Custom object records appear alphabetically by name.
To help locate a specific record, you can click the letters above the list to navigate to the section of the list that contains names that begin with the letter you clicked. |

|
Attributes |
Each column heading represents one of the attributes that your custom object records share in common.
For example, this list has four attributes: Branch Name, Address, Web link, and Description. To modify the existing attributes, click the record name. |

|
Import records |
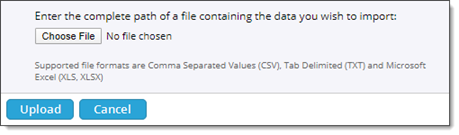
If you have existing records stored in a comma separated values (CSV), text-delimited (TXT), or Microsoft® Office Excel® (XLS, XLSX) file, you can import the records into your custom object folder.
The file you import:
To import a file:
The records in the file you imported appear in alphabetical order in your custom object folder. |

|
Export records |
You can export the records currently in your custom object folder to a comma separated values (CSV) file. You can save the exported CSV file to a Microsoft® Office Excel® (XLS, XLSX) file, as appropriate.
The exported file contains:
To export the records in the custom object folder:
The records currently in your custom object folder appear in the downloaded CSV file. |
| Publish a custom object (not shown in the image above) |
(Available only with custom objects that are unrelated to events.)
To customize a custom object spud that you can embed in your website, click Publish Settings. Tip You may also not see a Publish button if the custom object is not shared with you for publishing.
For more information, go to Add and customizing spuds. |
 ) to edit it.