You can make your events and objects more interesting and shareable by letting visitors comment on them. To enable comments, use either the Disqus commenting service or the Facebook comments plugin.
What you'll learn in this topic:
To set up Disqus comments, you must first sign up for a Disqus account and choose a short name that identifies the website where you want comments enabled. For example, to enable comments in your Trumba® spuds, identify the website where the spuds are embedded and give the website a short name.
You enable Disqus comments for a publication by customizing the publication's event and object detail views.
What are event and object detail views?
If you're customizing an object detail view, at the top of the page above the publication name, click the object's tab, and then click Publish Settings.
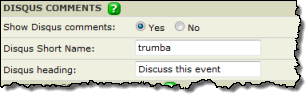
Disqus comments settings with trumba as the placeholder short name.
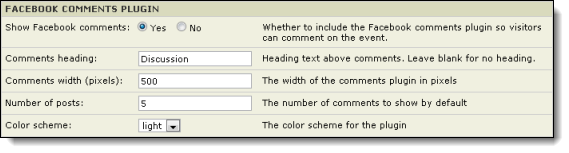
Facebook comments are incorporated into Trumba events and objects through the Facebook comments plugin. This plugin is a service provided by Facebook that allows site visitors to comment on content in your website.
Trumba has integrated the plugin into detail views, so that your site visitors can comment on events and custom objects directly in those views. Visitors can opt to post their comments to their Facebook news feeds, thereby providing additional exposure.
Facebook comments support a number of advanced features, such as comment moderation and blacklisted words. You can enable these features by creating your own Facebook app and linking it to your website. For information, see Link your site to a Facebook app below.
You can learn more about the Facebook comments plugin on the Facebook Developer Site.
If you're customizing an object detail view, at the top of the page above the publication name, click the object's tab, and then click Folder Settings.
If you have events that are published in multiple publications on separate pages on your website, comments will show only on the webpage where the comment was originally made. This is a limitation of the Facebook comments plugin, which must be tied to a specific URL.
For instance, you might have an event that is published on a department calendar and is also mixed into an organization-wide calendar. In this case, if a visitor posts comments to the event on the department calendar page, those comments do not appear on the organization-wide calendar.
Linking your site to a Facebook app provides more control over comments. For example you can moderate comments and specify blacklisted words.
Note: If you already have a Facebook app that you use for your website, you can use the existing app by setting the Site URL to your site.
Create a Facebook app
During this proces, make note of the App ID. You will need to enter this on your website.
The Site URL must be the site that contains your published calendar and object views.
For instance, if your calendar page is at http://www.example.com/calendar.html, you would enter http://www.example.com for the Site URL
Add the App ID to your website
To link your website to your Facebook app, place the following HTML code into the head section of each page on your site that contains a main calendar or custom object spud, replacing {YOUR_APPLICATION_ID} with your App ID.
Facebook comment moderation and settings
Once you have linked your webpages to your Facebook app, you can find more settings and moderate comments at the following location:
http://developers.facebook.com/tools/comments
Tip The link above works only if you have an app set up on your Facebook account. If you don't have an app set up and you want some information about the Comments plugin, visit this page instead.