Calendar email messages are scheduled or one-time messages that include upcoming events from one or more of your calendars. See: Calendar and event email: An overview.
You can customize the email messages sent from each of your calendars, per your organization's needs and requirements.
Note Customizing a calendar email view is not a requirement. After you publish your calendar, visitors can automatically subscribe to and receive the default calendar email.
This topic covers how to:
See also:
Emails sent from a calendar use an email "view" as a template. You can select a different view for one or more of your calendars (and then customize it, as appropriate).
You can click Preview next to each view to see a partial preview of how each would look:
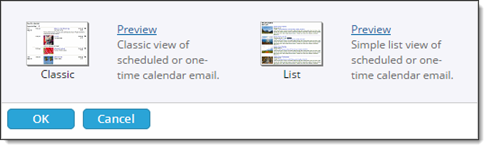
For information on seeing a full preview, go to Preview calendar email.
To accept the defaults, go to the bottom of the Edit Settings page for the view you selected without changing any of the settings, and then click OK.
Note You can always change a setting and then click Preview to review the results prior to saving your changes.
You can customize your calendar email views, as appropriate, to reflect your organization's brand and other requirements.
To start, you select a baseline view. See: Select a different calendar email view.
You can then:
For more information, go to:
As described in Calendar and event email: An overview, a complete calendar email setup involves two interrelated parts:
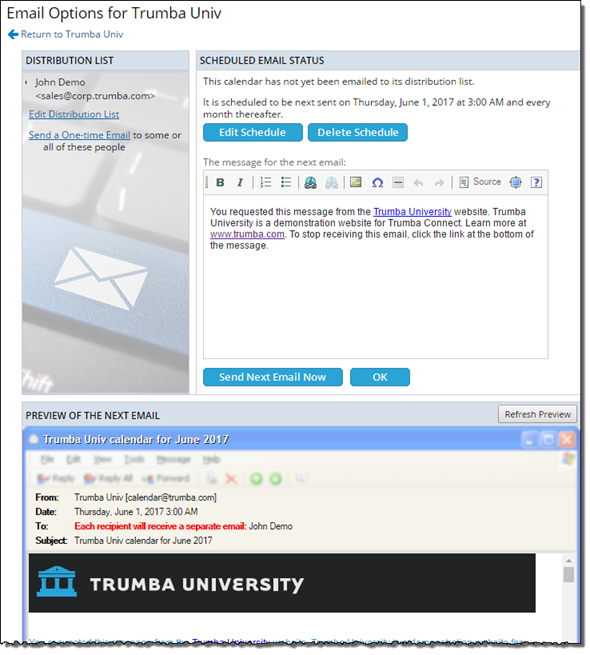
In the Publishing Control Panel, on the Email tab, you can do a partial preview of how your calendar email appears to recipients by clicking Preview below the view description.
For a full preview, return to the email options side of the setup process: