You can add images to events and then decide in which published views you want to display them.
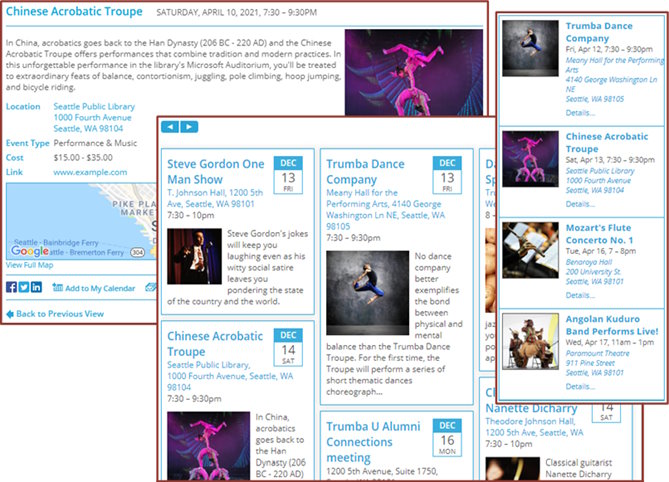
Images displayed (from left to right) in event detail view, Tile calendar view, and a promotion spud.
Important This topic is primarily about using event and detail images. You can also use the HTML editor in Trumba to insert "inline images" within the text in event descriptions (and other multi-line text fields where you and event editors add custom content). For more information, see HTML Editor.
To include images in published views, the first step is to associate the images with specific events.
You associate images with events by adding one or both of the following image fields to the event templates you use with your calendars:
I'm not sure how to add fields to event templates.
Important Supported image types include: .BMP, .JPEG, .GIF, .TIFF, and .PNG.
These fields, which are predefined, have special capabilities that let you add new images and list or search for images you have previously used.

Predefined image fields have special image-location capabilities.
I'd like some details about how those special capabilities work.
After you use the fields to add images to events, you can then customize your published views to display the images. For example, you can customize the image settings in calendar and the event detail views to display the images at a specific size with specific style settings.
It matters which field you place an image in. The following table describes the relationship between the image field and the views in which the image can be published.
| Images in this field | Can be displayed in |
| Event Image |
|
| Detail Image |
|
*Calendar views that support event images Classic Table, List, Photo Events, Detail List - Title, Detail List - Date, News, Tile, and Mobile Table
**Promotion spuds that support event images Photo Upcoming, Upcoming Table, Upcoming Fader List, Upcoming Vertical Crawler, and Event Slider
Where can I learn more about adding and customizing spuds?
When you add an image to an event, you can:
Files you copy and upload are stored in a hosted location on the Trumba servers.
You can see a list of all images that you link to, copy, and upload on the Images tab in the editing environment.
How do I manage my images collection on the Images tab?
I need more information about adding fields to templates and associating templates with calendars.
When you select this event template, the Event image and/or Detail Image fields appear in the form.
What's the difference between the two image fields?
Tip If you use just the Event image field and leave the Detail image field blank (or don't include it at all), the event image appears in both the calendar and event detail views. If you specify both an event and detail image, you see different images in each view. You can still customize the image size for each view. Typically, you use larger images in event detail views (Detail Image).
Tip If you click New to add a new image file, the Add Image window opens. For help with options in that window, click the Image Source or Image Properties blue buttons.
Where can get more details about adding images using search?
Should I make images the right size for my spuds before I upload them?