For many Trumba implementations, you can manage all of your events by customizing one event template with a few custom fields.
But, as the implementation guide points out, to achieve some goals, you will need to create one or more new event templates from scratch.
This topic describes how to:
Customizing an existing template means:
How-to steps described below.
How-to steps available at Create custom event fields.
Where can I learn more about rearranging and hiding an event template's fields?
Make event template names meaningful. Names that explain the template's purpose help calendar editors choose the right template when they create events.
For example, you might want to use a more meaningful name for the default template that comes with each new Trumba account. Or, you might want to change the name of an event template you created in the past.
To rename a template
Tip If you don't see the template you're looking for, in the Publication drop-down list, select [all publications].
The new name appears in the bar at the top of the template box.
You can often handle all of the event categories your implementation requires using just a single event template with a few custom fields.
However, if adequately describing an event category requires a unique collection of fields, it's appropriate to create a new event template.
I'd like more information about deciding whether or not I need more than one event template.
To create a new event template
Tip After you create an event template, you can always associate the template with any calendar or publication you want.
If you made a published calendar active before you created the new template, you see the Enable template on all calendars in the current publication option. Select this option to associate the new template with subcalendars of (and all calendars mixed into) the published calendar.
Tip If you clear Enable template on all calendars in current publication, the new template is not associated with any calendars or publications, including the calendar or publication that was active at the time you created the template.
A new template box is added to the define fields page.
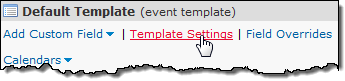
Tip To quickly add existing or new fields to the new template, instead of clicking Template Settings, pause your cursor over Add Custom Field, and select the field you want to add or click Create New Field.
If you use a fixed set of event titles for all your events, you can create a custom List of Choices field to replace the built-in Title field. This makes life easier and less error-prone for event creators. Instead of typing the same event titles again and again, they can simply select the correct description from a list.
For more details, contact your Trumba Client Services representative.
I'd like more information about custom objects and List of Choices fields.
To give editors the option of using either the built-in or custom location field, for All overrides, select Yes
Tell me more about Location Types.
A quick way of creating a new event template is to copy an existing one and then modify the copy's settings.
To copy a template
If no calendars are associated with an event template and you don't intend to use the template in the future, you can remove it.
Tip If you don't see the template you're looking for, in the Publication drop-down list, select [all publications].
As described above, in the process of creating a new template, you can associate that template with one or more calendars and publications. But you can also associate a template with any calendar after the fact.
In addition to associating an event template with a calendar, you can also set a default template. This is the event template that is used by default each time you create a new event.
Tip Assigning a default template doesn't mean you're stuck always using that template with each new event. On calendars associated with multiple templates, each time you create a new event, you can choose the template you want to apply.
When you think about choosing a template for an event, it helps to remember what templates are actually for. Event templates are collections of fields. You create multiple templates because different categories of events use different collections of fields.
When you're creating an event, choose the template that includes the fields appropriate for the category in which the new event belongs.
To assign an event template to an event
If there are multiple templates associated with the calendar, you can open the Template drop-down, and then select the template you want to use. Notice that the Event Information form changes to reflect the fields included with the template you selected.
Tip If there are multiple templates associated with the calendar, you can switch event templates for existing events. However, fields from the old template that contain information carry over to the new template, even if the new template does not typically include those fields. To prevent old fields from carrying over to the new template, delete the information you entered into the old fields before you change templates.
If your implementation has more than one Publisher account or you coordinate events with another organization, you may want to share one or more templates across accounts. Sharing templates promotes consistency and saves time by avoiding duplicated effort.
To share a template with another account, talk with your Trumba Client Services representative about enabling the feature on your account.
Tip If one of your event templates includes some custom fields that another account wants to use, you don't have to share an entire template. You can just share the relevant fields instead. Learn more.
To share a template with another account
Or, under Enter email addresses..., type the email address.
To use a template that is shared with you, follow the instructions for associating an event template with a calendar.
Tip Because you can't modify templates that are shared with you, these templates are not listed on your define fields page. However, you can associate a shared template with any calendar in your account.