In Get Started 1, you reviewed the hosted calendar and Trumba® editing environment defaults generated by the Trumba Startup Wizard. This article covers updating the fields and settings created by the wizard, and steps through adding your own events:
Tip You can print this article from your browser, or to work on-screen, you can open two browser windows, one with this article and the other with the Trumba editing environment.
On the first screen in the Trumba Startup Wizard, you accepted (or modified) the organization name you used when you registered for your trial. The wizard uses your organization name in creating the calendar name.
Change a calendar's name (and other settings)
You can change a calendar's name and adjust other calendar-related settings in the Trumba editing environment.
Or, click the small arrow to the right of calendar's name, and then from the drop-down menu, click Calendar Settings.
When you completed the Trumba Startup Wizard, you accepted (or modified) the web name the wizard suggested for you. You can change it now, as appropriate. Best practice is to select a very generic and unique web name that is unlikely to ever change.
Important: If you do change the web name, you need to verify that it is updated:
Note The web name must be unique. It's an essential parameter in URLs that link your site visitors to specific calendar views, and in URLs for custom feeds of calendar events. For more information, go to What a web name is, isn't, and why it matters.
Change the web name for your published calendar
(These steps cover how to change the web name for a published calendar. If the calendar is not published, you can change its web name using Calendar Settings -- similar to steps in Rename the calendar.)
You can change a calendar's web name by following these steps.
On the second screen in the Trumba Startup Wizard, you chose a calendar type. All calendar types come with the following standard data fields on the default event template: Title, Location, Date/Time, Description, and Web Link, so you'll also have these fields on your default event template, regardless of which type you chose.
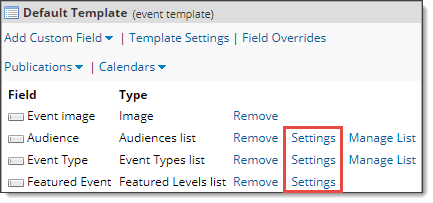
Each calendar type also comes with a set of the most appropriate custom fields for that type. For the Get Started articles, we chose the General Events calendar type, which comes with the custom fields: Event Image, Audience, Event Type, and Featured Event. Your default event template may have different custom fields, but you can still leverage the steps below.
Note: An event template is a collection of fields used to create new events. By adding custom fields (and values) to the event template, you can create the filters your site visitors need. The default fields Event Type and Audience, for example, can provide a view limited to only those events that match one or more selected types, and that are intended for one or more audiences (e.g. Teens and Adults).
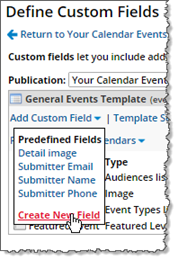
Update default custom fields; create new custom fields
Updates and additions to custom fields are saved to the default event template associated with your calendar.
Note: The default event template also comes with two other custom fields: Event image, which lets you include images with events; and Featured Event, which lets you promote selected events, such as on the event slider that we reviewed in Get Started 1 on the default hosted calendar.
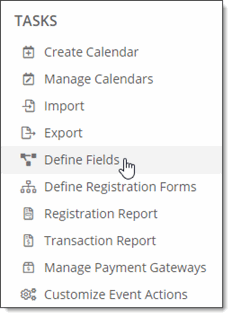
Click Settings next to each field, one at a time:
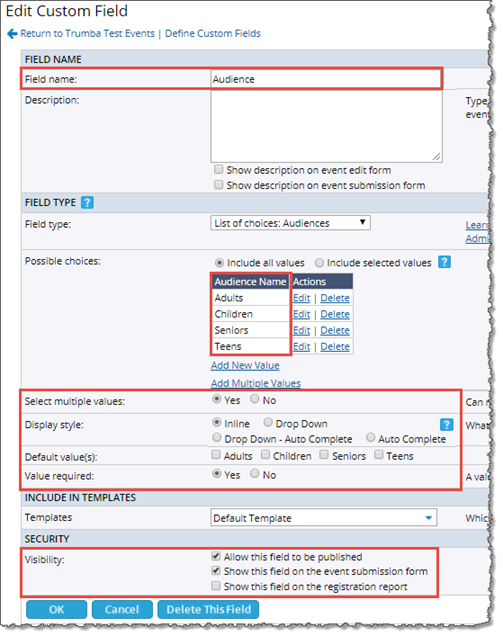
On the Edit Custom Field page, review and/or update the default values generated by the wizard, as appropriate for your organization.
For Audience, along with other available settings:
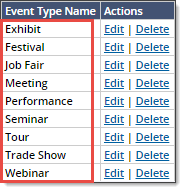
And for the Event Type, a screenshot of just the values:
On the Edit Custom Field page, you can change the name of the field; add, or delete values; set the fields to single- or multi-select; change the default value; set the fields to be required (or not); and more.
Descriptions can help if more than one person will be adding events to your calendars and you want to provide guidance. Descriptions also serve as tooltips (below the field) on the add/edit event form, such as in this example:

When you select a field type with multiple choices, the Possible choices section appears beneath it. To add multiple values, click Add Multiple Values, type the new values separated by commas, and then click Save Values.
For our "Neighborhood" example, we added: Downtown, Capitol Hill, Colombia City, West Seattle, Ballard, University District.
You can also configure whether to allow selecting multiple values, the display style, and the default values, if any.
Tip If most of your events use certain values, setting a default value can save you time when entering large numbers of events.
If you select Value required = Yes, a warning message appears when an event submitter tries to create an event without setting a value for the new field.
Tip The ability to prevent fields from appearing on published calendars allows you to use custom fields internally. For example, if more than one person creates events, you might create an unpublished field for private notes.
If you've created the new Neighborhood custom field, you'll need to add an event to your calendar with the Neighborhood field set in order to see it added to the filter on your hosted calendar.
You'll also need to add the new field (plus reflect other changes to your custom fields) in the Filter control spud. For more information, go to Review the spuds that drive your hosted calendar.
Note Fields/values appear on the calendar only if they exist on an event.
The sample events that came with your calendar are flagged, as a set, with all of the default custom fields and values. If you delete a value before clearing out the impacted events, those events lose that value.
In this section, you'll learn how to manually add new events to your calendar, including populating any data fields that you may have modified or added in the section above.
Note If you subscribe to Trumba Connect, and you currently store your event information in another calendar program or database, you may be able to import the event information into Trumba, and avoid having to re-enter the information manually. See Import Events.
Add events to a calendar
Note You can click Create & Copy to create additional events based on information you've already provided.
The image display name and pixel size appear in the Event image field.
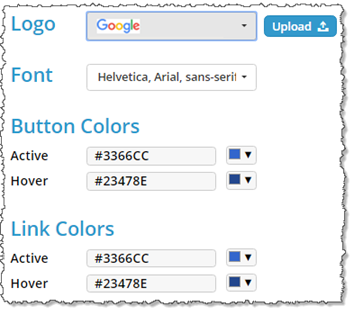
On the third screen in the Trumba Startup Wizard, you either scanned a website to apply its colors and styles, or you skipped this feature.
We scanned Google.com, as an example, for writing these articles. On the fourth screen, we used the standard Google logo for the header, and kept all the colors and styles as they came in from www.google.com:
The resulting hosted calendar then appears as:
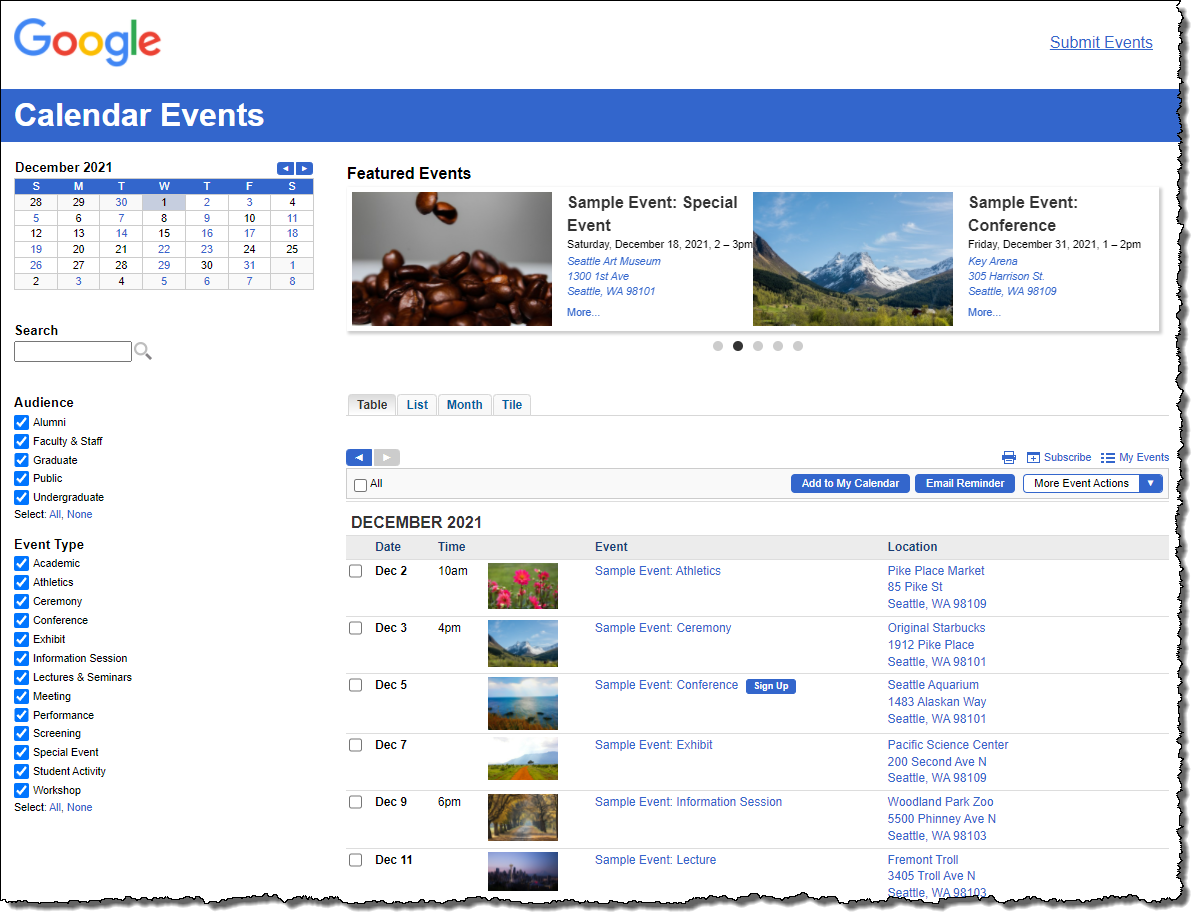
© 2021 Google Inc. All rights reserved. Google and the Google Logo are registered trademarks of Google Inc.
Go to your live, hosted calendar to see how the colors and styles you selected look in action. For more information, go to Get Started 1: Review your live calendar and Trumba editing environment.
Update the colors and styles generated by the Trumba Startup Wizard for your hosted calendar.
This section walks you through how to change the default color and style settings on your hosted calendar, using the Trumba editing environment.
For more information, go to Use custom fonts.
For more information, go to Why and how to set base styles.
Update the colors and styles for the Event Actions web app.
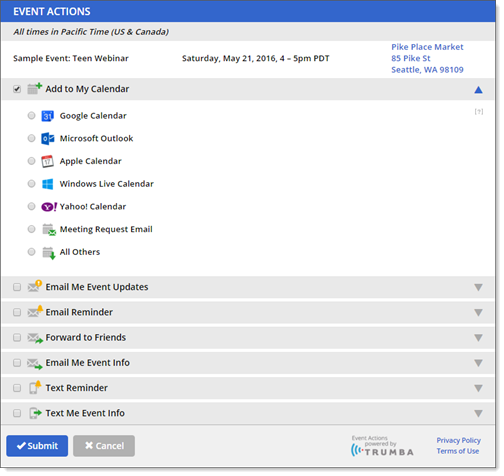
The colors and styles the Trumba Startup Wizard generated for your hosted calendar also apply to the Event Actions web app.
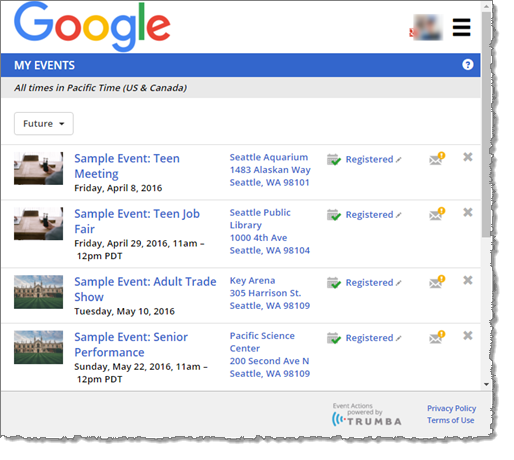
Note Visitors to your calendar can take actions on events through using the Event Actions web app, including adding events to their personal calendars or setting up event reminders. For more information, go to Get Started 5: Event and calendar actions.
You can display the Event Actions web app (shown below with the defaults from our Get Started example calendar) by going to My Events, or by taking an action on an event.
For more information, go to Customize the Event Action Web App.